


Words by Phoebe Georgiou
Now and then it's important we all go back to the basics and practices things we often overlook. This is especially true in yoga, where there is so much to be gained from pausing and appreciating your body in poses that are sometimes glazed over as a 'beginner' pose or a transition between other postures.
But in the case of the Warrior Poses, there is much to be gained by appreciating them step-by-step. So here's how to master Warrior Pose I, II, and III.

WHAT IS WARRIOR POSE?
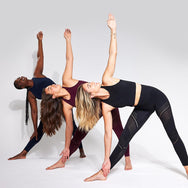
Warriors I, II, and III are the most strong and accessible postures in yoga. Whilst they have many benefits, strengthening both body and mind, the beauty of these poses is everyone can access them, from beginners to advanced practitioners, all receiving the same benefits.
The Sanskrit name for the Warriors is Virabhadrasana. Virabhadra - the name of a fierce warrior - a Hindu god who was created by Shiva in an uproar against the Yagna of Dashka. Asana - meaning posture.
THE BENEFITS OF WARRIOR POSE
The benefits of these strong standing asanas come in physical and mental form. Mentally performing each asana sets a strong foundation from the root up. Standing tall, proud and challenging the mind to mentally focus whilst maintaining a controlled breath.
Physically, the Warriors have transforming strengthening benefits, benefitting the glutes, hamstrings, quadriceps, core, feet, shoulders and arms. If you are looking for an all round pose to strengthen the entire body, your go to is Warrior I and II.
WARM UP DRILLS FOR WARRIOR POSE IN YOGA
Maybe just a couple of your favourites, as the majority of the article will focus on the various Warrior Poses!
My favourite warm up drill for Warrior II would be Baddha Konasana (butterfly pose) and Utkata Konasana (goddess squat) due to the openness needed in the hips/groin and super strong legs and glutes for this Warrior, Warrior II is known to be the strongest Warrior out of the set.
Step by Step How to do Warrior Pose 1
-
Start in Tadasana (mountain pose) at the front of your mat. Step one leg/foot back at least 1metre away from your front foot.
-
Heel to heel alignment. If you have tight hips you can place the feet hip distance apart.
-
Keeping the hips square, chest and gaze forward.
-
Turn the back foot in by a 45 degree angle.
-
Reach the arms up biceps by ears. Rotating the biceps back and having the palms also face behind, almost like you are throwing a ball behind you.
-
Keeping the shoulders above the hips, slowly bend into your front leg, almost creating a lunge like movement, whilst keeping your back leg strong.
-
Keep your knee parallel with the front foot.
-
*IMPORTANT NOTE* I have always heard cues in yoga classes ‘don’t let your knee go beyond the ankle’ this cue is a myth, as if you look at athletes their knees often go beyond their ankles, as yoga practitioners we should not be made fearful of having our knee going beyond this point, as in fact having the knee pass the ankle, builds even more strength in the quads, hamstrings and glutes.
-
Lastly, keep your drishti (focus, gaze) ahead of you.
Step by Step How to do Warrior Pose 2
-
Start in Tadasana (mountain pose) at the front of your mat. Step one leg/foot back at least 1metre away from your front foot.
-
Heel to heel alignment.
-
Turn your hips and chest to face the opposite side of the front leg.
-
Turn the back toes in by 45 degrees.
-
Arms in a T shape, shoulders relaxed.
-
Drishti (gaze) forward past your front middle finger.
-
Bend into your front leg making sure your knee stays parallel with your front foot. Again it’s okay for your knee to go beyond your ankle ;)
-
Keep your shoulders above the hips.
Step by Step How do Warrior Pose 3
-
Start in Tadasana (mountain pose) at the front of your mat.
-
Incorporate a flow to get to Warrior III by inhaling reaching the arms up, exhale uttanasana (forward fold), inhale step one leg back come into high lunge, exhale come in to leaning lunge, place palms into prayer at the heart, start becoming light on the back foot eventually lifting the leg up in line with the hip balancing on the alternative leg. Staying strong in the standing leg and lifting the knee cap up. Chest in line with hips gazing down.
-
Flex your back foot, toes facing down, keeping your hips square and squeeze the glute.
CONCLUSION
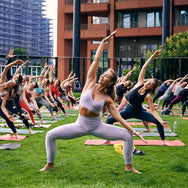
Incorporating the Warriors in your practice and sequences can easily benefit any practitioner in building confidence and serious strength. Before flowing through a Vinyasa class, I would recommend practicing your alignment first to ensure no injuries happen and for you to feel the entire benefits of the Virabhadrasanas.